
So I took some star trail photographs while I was in Ireland a few months ago (See those here) and it fascinated one of the kids of the family I am staying with. We are in a very rural part of Normandy, amongst fields of maze and fields with cows and sheep. There are only about 300 people in the immediate settlement around us, so it’s quite dark at night.
So one night a bit ago, I packed up my coat, my camera and tripod and stepped out into the cool french night. We walked to an old rock quarry about 5 minutes away by foot. The rock had been removed years ago, and had since filled in with water, leaving a large deep lake of sorts. The rocks left behind on the shore were sharp and jagged though, not the most pleasant atmosphere, looking more like the surface of Mars than Normandy. Looking up, however, revealed the millions of stars that are often obscured by the light pollution our city homes give off. After about 2 hours, between walking over there, setting up the camera, and taking a handful of long exposures, I ended up with some files to play with the next day. When I had finished my chores and had some free time, I set to playing with processing the images. After playing for a while I ended up with these:
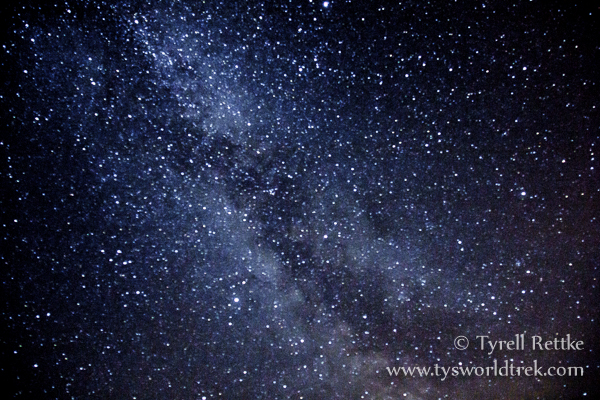
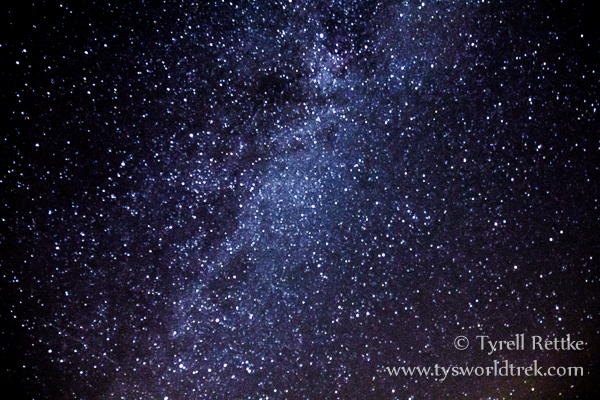
The Milky Way is clearly visible in both of these, as is a nice hue of color from the millions of stars visible from Earth.
I have received a lot of questions on photography so I thought I’d give a how to on achieving these pictures.
GEAR YOU WILL NEED:
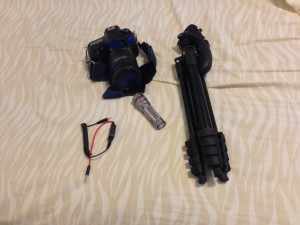 DSLR Camera with a fairly wide lens. I used an 18-200 mm lens, because of it’s versatility.
- Tripod. A solid tripod is essential, as is the head on the tripod. It needs to be able to turn the camera to be facing nearly straight up to get some shots.
- A trigger release. This is essential because simply touching the shutter button on the camera will create shake in the image. A cable release or wireless release is essential!
- A flashlight. It’s going to be dark. (That is kind of the point). This will make your walk, and seeing where your settings are in the dark easier.
- A coat. It will probably be cold, and you will be out in the dark for a good long while.
Step One: Location Location Location!
You will need to find a place that is away from light pollution. Even being around the other side of a mountain will not remove all the light. Around the edge of the horizon you may notice a haze of yellow-ish orange-ish light. This will likely be the lights of a nearby town refracting off the atmosphere and giving you a washed out area. It isn’t always an issue, if you can point away from a nearby town, but the biggest thing to do is get as far away from lights as you can!
Once you have located your place you will want to set up your tripod. Achieving focus will be difficult, because the auto focus relies on contrast to lock in, however if you switch the lens to Manual focus you should be able to get a good infinity setting for the stars. If you Keep something in the foreground, like a treeline, or mountain top, you will need to focus on that, which can be hard in low light. Try using the infinity focus. It should be close enough for objects that are farther away such as the scenery. If you have something like a building or object very close, try setting your flashlight near it and go back to focus on that, then set the camera to manual and retrieve the flashlight.
Step Two: Settings, Trial and Error.
To start out with you will need to have your trigger release hooked up to the camera. The one I am using is a cord that attaches my smart phone to the camera and an app that controls the camera. There are many types but getting a good one will also include what is known as an intervalometer. This device allows you to set a series of exposures to a specific interval. Example: Take a 1 second exposure every 5 seconds for 100 exposures. This will give you 100 pictures over the course of 10 minutes. (5 seconds between and 1 second per exposure =6 seconds x 100 exposures = 600 seconds = 10 minutes)
This is useful if trying to create a “Star Trail” picture like the one from THIS article, or if you are planning on “Stacking” your images (Google the terms “Astral Photography Stacking”). If you aren’t doing that, but instead just want single exposures like above, then having a simple trigger release will suffice.
The cameras settings should start out in Manual Mode. Set your ISO to something high like 1600 or 3200 to start with. The higher the ISO setting, the more sensitive to light the camera is. This means, that the higher this setting, the more stars will be captured.
You should also set the aperture to the fastest setting ( F/3.5 or smaller). The lower the F stop number, the wider the opening of the lens aperture blades, and the more light that is allowed into the camera, again giving you more stars.
Finally set the shutter speed. Because the Earth is rotating on it’s axis, the stars appear to be moving overhead, albeit very slowly. If your cameras shutter speed is too slow, your stars will star to elongate due to this movement of the Earth. This is called star “trailing”. There is a rule of thumb called the “RULE OF 600” that you can use to maximize your exposure and not get this trailing. Basically you take 600/the focal length you are shooting at and the result is the number of seconds that your exposure can be before trailing will occur. So if you are shooting with a great big 600mm telephoto lens, your exposure can only be 1 second before trailing will occure. (600/600mm= 1second). If you are shooting with a 200mm lens, then you can shoot for 3 seconds. (600/200mm = 3 seconds). If you are shooting with a 10 mm lens, you can shoot for upto 60 seconds without trailing (600/10mm = 60 seconds). So take your lens (I used a lens at about 20 mm.) and figure out your MAX exposure time. Mine was 30 seconds with out trailing. This is JUST to prevent trailing!
So your camera is in manual mode. Your ISO is at 3200, your aperture is at it’s fastest setting. Now you know your lens’ longest exposure that you can take without trailing effects. For ease, I will say that it was 30 seconds like mine. Start at 10 seconds and take an exposure. Now look at your histogram and see where your image is falling. It will be mostly in the darker quadrants of the graph. Now increase the exposure time until the histogram doesn’t quite fall off the dark edge of the graph. This means that you are capturing some information in the darkest areas, as well as the lightest.
The above images were shot at 20 seconds and show no noticeable trailing. There are a few small trails that can be seen, those are a satellite, an airplane high above and a meteor.
Step Three: Post production.
Now when you are done, your picture will not look like the ones above. It will be very flat looking and have a dull tone, and little if any coloring. You will need to process it in Lightroom or Photoshop or something similar. GIMP is a free version of Photoshop that you can use. I used Lightroom to adjust the exposure, color temp and contrast, as well as other things, to attempt to get it closer to what I saw, and a little more intense than that.
Post production can take many times longer than the photographing itself, so be aware of that before you set out. There are many good tutorials available on Youtube and other locations on this step.
I hope this has been informative. Please feel free to ask questions Below
 William the Conqueror was the illegitimate child of the Duke of Normandy, born in 1028. After many years of infighting William became the Duke of Normandy. In 1066 he had secured his hold on Normandy so the descendant of viking raiders then set his eyes on the crown of England. He was the cousin, though illegitimate, of King Edward (The confessor) of England and by the 1050’s was a contender. There were other claimants, so a power struggle ensued, with William being crowned the first Norman King of England on Christmas Day, 1066.
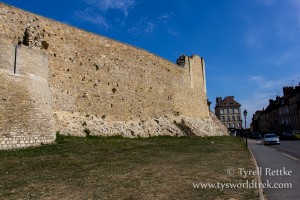 My first impression of the fortress was that it was huge. The walls seemed exceptionally thick, made of a pale limestone, they rise out of a modern town, with a paved road running around it and small shops and cafes across from it, looking over the foreboding structure. I was visiting the structure with one of the French students that was attending the English school I am currently volunteering at. We stepped inside the main building to buy our tickets. With the self guided tour ticket, came a digital tour installed on an Ipad.
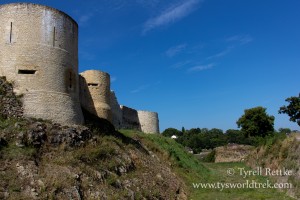

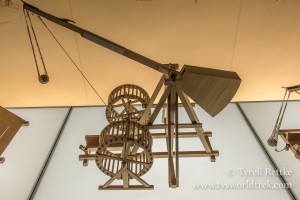
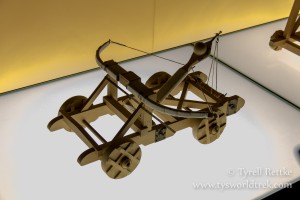 Another interesting section is the war machine room. It shows the development of ancient war machines such as catapults, massive crossbows, seize towers and trebuchet. There are models of the various designs that were used over the years up to the development of the early cannon, which marked the end of the castle and large fortress era. These early war engines could lob a 100lb stone ball 100-150 yards inflicting major damage to the walls of stone fortresses and castles.
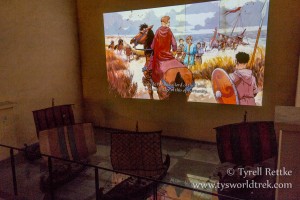
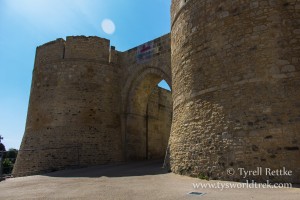 The main gate of the fortress, just after crossing the outer moat (now empty)
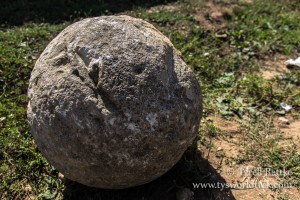 A 100 lb (+) stone ball used as ammunition to rain down on enemies below, or to bring down the walls of other fortresses.
 Finally, a statue of William the Conqueror that sits outside in the street area in front of the his imposing chateau, surrounded by other lords and rivals of his.